5. BSP
The Board Support Package is composed by a set files, patches, recipes, configuration files, etc. This chapter gives you the information you need when you want to customize something, fix a bug, or simply learn how the all thing has been assembled.
5.1. U-boot
The bootloader used by Hachiko board is U-Boot. If you need to modify the bootloader or to recompile it you have two ways to get the sources:
- use the sources you find in Yocto build directory after having compiled at least once a yocto image, or
- download the official u-boot release, than patch it with the BSP patches for Hachiko board.
Anyway, we will assume in this guide that u-boot sources will be copied to:
/home/architech/Documents/u-bootand such directory does not yet exists on your PC. Of course, you are free to choose the path you like the most for u-boot sources, just remember to replace the path used in this guide with your custom path.
5.1.1. From Yocto sources
The first way is based on the sources set up by the Yocto build system. However, it is never advisable to work with the sources in the Yocto build directory, if you really want to modify the source code inside the Yocto environment we strongly suggest to refer to the official Yocto documentation. To avoid messing up Yocto recipes and installation, it is desirable to copy the patched u-boot sources you find in the build directory elsewhere. The directory we are talking about is this one:
/home/architech/architech_sdk/architech/hachiko-tiny/yocto/build/tmp/work/hachiko-poky-linux-uclibceabi/u-boot/2013.04-r0/u-boot-2013.04/Replace:
/home/architech/architech_sdk/architech/hachiko-tiny/yocto/build/all over this chapter with your custom build directory path if you are not working with the default SDK build directory.
5.1.2. From the official u-boot release
The second way is to get the official U-Boot sources and patch them with Hachiko BSP patches. Hachiko board uses U-Boot version 2013.04, which can be downloaded from:
ftp://ftp.denx.de/pub/u-boot/u-boot-2013.04.tar.bz2.
with this command:
cd /home/architech/Documents
wget ftp://ftp.denx.de/pub/u-boot/u-boot-2013.04.tar.bz2
then extract the tarball:
tar -xjf u-boot-2013.04.tar.bz2
mv u-boot-2013.04 u-boot
Patches are to be found in the Yocto meta-layer meta-hachiko. You can use them right away if you are working with the SDK:
patch -p1 -d /home/architech/Documents/u-boot < /home/architech/architech_sdk/architech/hachiko-tiny/yocto/meta-hachiko/recipes-bsp/u-boot/files/0001-Add-bps-patch-v2.0.0.patch
patch -p1 -d /home/architech/Documents/u-boot < /home/architech/architech_sdk/architech/hachiko-tiny/yocto/meta-hachiko/recipes-bsp/u-boot/files/0002-Add-hachiko-support.patch
However, if you are not working with the official SDK the most general solution to check them out and patch the sources is:
cd /home/architech/Documents
git clone -b dora https://github.com/architech-boards/meta-hachiko.git
patch -p1 -d /home/architech/Documents/u-boot < /home/architech/Documents/meta-hachiko/recipes-bsp/u-boot/files/0001-Add-bps-patch-v2.0.0.patch
patch -p1 -d /home/architech/Documents/u-boot < /home/architech/Documents/meta-hachiko/recipes-bsp/u-boot/files/0002-Add-hachiko-support.patch
Configuration and board files for Hachiko board are in:
/home/architech/Documents/u-boot/board/renesas/hachiko/*
/home/architech/Documents/u-boot/include/configs/hachiko.h
Suppose you modified something and you wanted to recompile the sources to test your patches, well, you need a cross-toolchain (see Cross compiler Section). Luckily, the SDK already contains the proper cross-toolchain. To use it to compile the bootloader or the operating system kernel, just run:
source /home/architech/architech_sdk/architech/hachiko-tiny/toolchain/environment-nofsthen you can run these commands to compile it:
cd /home/architech/Documents/u-boot/
make mrproper
make hachiko
make
Once the build process completes, you can find u-boot.bin file inside directory /home/architech/Documents/u-boot.
If you are not working with the virtual machine, you need to get the toolchain from somewhere. The most comfortable way to get the toolchain is to ask Bitbake for it:
cd /path/to/yocto/directory
source poky/oe-init-build-env
bitbake meta-toolchain
When Bitbake finishes, you find an installer script under directory:
/path/to/yocto/directory/build/tmp/deploy/sdk/Run the script and you get, under the installation directory, a script to source to get your environment almost in place for compiling. The name of the script is:
environment-setup-cortexa9hf-vfp-neon-poky-linux-uclibceabiAnyway, the environment is not quite right for compiling the bootloader and the Linux kernel, you need to unset a few variables first to get it ready:
unset CFLAGS CPPFLAGS CXXFLAGS LDFLAGSHere you go, you now have the proper working environment to compile u-boot (or the Linux kernel).
5.2. Linux Kernel
5.2.1. Build from sources
As seen for U-Boot in the previous section, the first step is to get the kernel sources, which in this guide we assume that they will be copied to directory:
/home/architech/Documents/kernelYou are free to choose the path you like the most for the kernel sources, just remember to replace the path used in this guide with your custom path. The suggested way, even for the kernel, to get the sources is to take them from the Yocto build directory (copying them in the aforementioned directory to avoid messing up Yocto):
/home/architech/architech_sdk/architech/hachiko-tiny/yocto/build/tmp/work/hachiko-poky-linux-uclibceabi/linux/3.8.13-r2/linux-3.8.13/or from the vanilla kernel tarball at this URL:
and patch it using the patches found in Hachiko BSP meta-layer:
patch -p1 -d /home/architech/Documents/kernel < /home/architech/architech_sdk/architech/hachiko-tiny/yocto/meta-hachiko/recipes-kernel/linux/files/0001-Imported-Renesas-patch-v2.0.0.patch
patch -p1 -d /home/architech/Documents/kernel < /home/architech/architech_sdk/architech/hachiko-tiny/yocto/meta-hachiko/recipes-kernel/linux/files/0002-Add-hachiko-support.patch
If you are not developing from within the official SDK, the most general solution to check them out and patch the sources is:
cd /home/architech/Documents
git clone -b dora https://github.com/architech-boards/meta-hachiko.git
patch -p1 -d /home/architech/Documents/kernel < /home/architech/Documents/meta-hachiko/recipes-kernel/linux/files/0001-Imported-Renesas-patch-v2.0.0.patch
patch -p1 -d /home/architech/Documents/kernel < /home/architech/Documents/meta-hachiko/recipes-kernel/linux/files/0002-Add-hachiko-support.patch
To compile the kernel without bitbake just execute these commands:
cd /home/architech/Documents/kernel
source /home/architech/architech_sdk/architech/hachiko-tiny/toolchain/environment-nofs
make hachiko_defconfig
make uImage dtbs
If you are not developing from within the original SDK, you are going to need to install the cross toolchain. The output of the compilation process is:
/home/architech/Documents/kernel/arch/arm/boot/uImage
/home/architech/Documents/kernel/arch/arm/boot/dts/rza1-hachiko.dtb
5.2.2. Build from bitbake
The most frequent way of customization of the Linux Kernel is to change the .config file that contains the Kernel options. Setup the environment and run:
bitbake virtual/kernel -c cleanall
bitbake virtual/kernel -c menuconfig
a new window, like the following one, will pop-up:
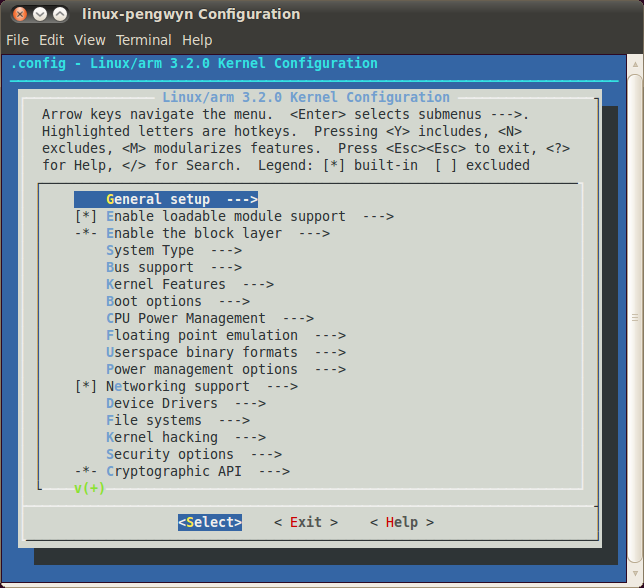
follow the instructions, save and exit, than you ready to generate your preferred image based on your customized kernel. If you prefer, you can build just the kernel running:
bitbake virtual/kernelAt the end of the build process, the output file (uImage.bin), along with the built kernel modules, will be placed under tmp/deploy/images/hachiko/ inside your build directory, so, if you are building your system from the default directory, the destination directory will be /home/architech/architech_sdk/architech/hachiko-tiny/yocto/build/tmp/deploy/images/hachiko/.
5.3. Meta Layer
A Yocto/OpenEmbedded meta-layer is a directory that contains recipes, configuration files, patches, and others things all needed by Bitbake to properly “see” and build a BSP, a distribution, and a (set of) package(s).
meta-hachiko is stored in a git repository that can be cloned with:
git clone -b dora https://github.com/architech-boards/meta-hachiko.gitFor information about Yocto, Bitbake and the directories tree inside the meta-layer, please refer to the Yocto documentation.
Hachiko meta-layer defines two different machines: hachiko and hachiko64, the latter to be used when an external SDRAM is available on the board. Whereas hachiko64 machine can be used for virtually any distro and image available on Yocto, hachiko machine must use a custom tailored distro and image to be able to fit in the limited amount of SRAM available on-chip. This documentation is about hachiko machine.
To manually select board and distribution for Bitbake, make sure that file local.conf, that in the SDK has this path:
/home/architech/architech_sdk/architech/hachiko-tiny/yocto/build/conf/local.confcontains the assignment of these variables:
MACHINE = "hachiko"
DISTRO = "tiny-linux-uclibc"
When asked to build an image, Bitbake/Hob produces several files as output, of which these are needed to build the whole system:
- the Linux kernel - file uImage
- the device tree - file uImage-rza1-hachiko.dtb
- U-boot bootloader - file u-boot.bin
- the root file system - file *.tar.bz2
Within the SDK, the files will be emitted to directory:
/home/architech/architech_sdk/architech/hachiko-tiny/yocto/build/tmp/deploy/images/hachiko/If you are not working with the SDK, just replace:
/home/architech/architech_sdk/architech/hachiko-tiny/yocto/build/with your build directory path.
5.4. Root FS
By default, Hachiko Yocto/OpenEmbedded SDK will generate two different types of files when you build an image:
- *.tar.bz2, and
- *.jffs2
The .tar.bz2 file can be expanded in your final medium partition (flash memory or USB stick) or on your host development system and used for build purposes with the Yocto Project. File .jffs2 can be written out “as is” on the final medium (usually flash NOR partition) with, for example, dd program:
sudo dd if=/path/to/image.jffs2 of=/path/to/your/USB/deviceor
flashcp -v /path/to/image.jffs2 /dev/mtd4Important
Be very careful when you use dd or flashcp to write to a device to pick up the right device